Until I used Ubuntu 16.04, I didn't have much of a problem with UEFI. Just the first time it was confusing and
took a while to find the solution, but everything else, like third party drivers and VirtualBox worked without problems.
But when trying to install Ubuntu 16.04.6, the system wouldn't even start. It showed the below message and shutdown.
Unable to find mmx64.efi file:
Failed to open \EFI\BOOT\mmx64.efi - Not Found.
Something has gone seriously wrong.
It sounded like Russel Peter's Dad saying "
Somebody's gonna get hurt real bad".
For a long time, searching the internet didn't yield a solution, but some posts mentioned renaming
grubx64.efi to
mmx64.efi. The trouble with that is, that if you try to rename the file in Ubuntu, it won't work. Ubuntu shows you a totally different filesystem. You have to go to Windows (
or try the "Update" suggested by Stephen Samuel which I've mentioned below). In Windows, you won't be able to see all the files in the pen drive. It just shows you one folder into which you have to navigate into, find the
grubx64.efi file and rename it to
mmx64.efi.
Viola! You'll now be able to boot from the pen drive.
Funny thing is, after installing Ubuntu, you have to rename that file on the pen drive back to
grubx64.efi (and you have to do it in Windows, or perhaps just mount the correct partition in Ubuntu as mentioned in the update below and do the renaming), or else you won't be able to boot from the pen drive.
Update: There may not be a need to go to Windows to do this renaming. In the comments below, Stephen Samuel mentions that it might only be a matter of mounting the second partition on the pen drive. I have not tried it yet, but it seems plausible. The pen drive may have `sdb1` and `sdb2`. The `sdb1` partition may have been mounted on Ubuntu by default. So type `sudo fdisk -l` to view your partitions, and assuming your pen drive's second partition is `/dev/sdb2`, it might just be a matter of mounting it like this:
mount /dev/sdb2 /mnt
and renaming it like this:
mv /mnt/EFI/boot/grubx64.efi /mnt/EFI/boot/mmx64.efi
and then unmounting it like this:
umount /mnt Need to set the Mok state after reboot but the screen never shows up:
When installing VirtualBox or the third party drivers in Ubuntu, the screen says that on reboot, you'll have to type a password to enroll mok.
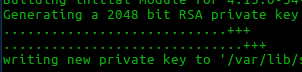 |
| You'll notice VirtualBox generating a private key for Mok |
However, when you reboot, you are never presented with any such mok screen.
What you are supposed to do to be able to see the mok screen is this:
- Go to BIOS.
- In the security page, select the option to "specify a trusted key".
- Navigate to "Ubuntu".
- Select "mmx64.efi", give it a name like "MokManager" or anything you like, save and exit BIOS and come back to BIOS again.
- This time in the Boot screen you'll see new boot options. Select the "MokManager" option and move it to the top so that it boots first. Save and exit BIOS.
- Now when you boot you'll see the Mok menu from which you can enroll the mok key that was generated by Virtual Box or the Ubuntu installer.
That's it. That's the secret of how to do MokManagement. There's no need of disabling UEFI. There's no need of disabling secure boot.
I just wish the OEM people and OS manufacturers came up with a standard which wouldn't require such complicated workarounds.


